在iOS项目中使用MagicalRecord
MagicalRecord 是一个方便进行CoreData操作的package。 类似于Rails中的ActiveRecord。
前提说明
- 这里不是一个guide,而是记录自己在使用中的过程以及问题。
- 该文章对应Example的github项目地址: MagicalRecordExample项目Github地址
安装
可以参考MagicalRecord的github项目中的安装文档,推荐使用 cocoapods 进行包管理。
# Podfile中添加以下内容
pod "MagicalRecord"
新建项目以及配置
新建xcode项目
这里新建的时候不要选择use Core Data。当然,如果选择了也没有问题,
选择了以后xcode会帮你生成维护ManagedObjectContext的代码,以及会生成ManagedObjectModal的文件,
而这些生成的代码,MagicalRecord是不会使用到的。

安装使用MagicalRecord
如果使用cococapods的情况下
- 在新建工程的根目录下执行
pod init命令 - 在生成的podfile中添加
pod "MagicalRecord" - 在新建工程的根目录下执行
pod install命令
配置使用CoreData
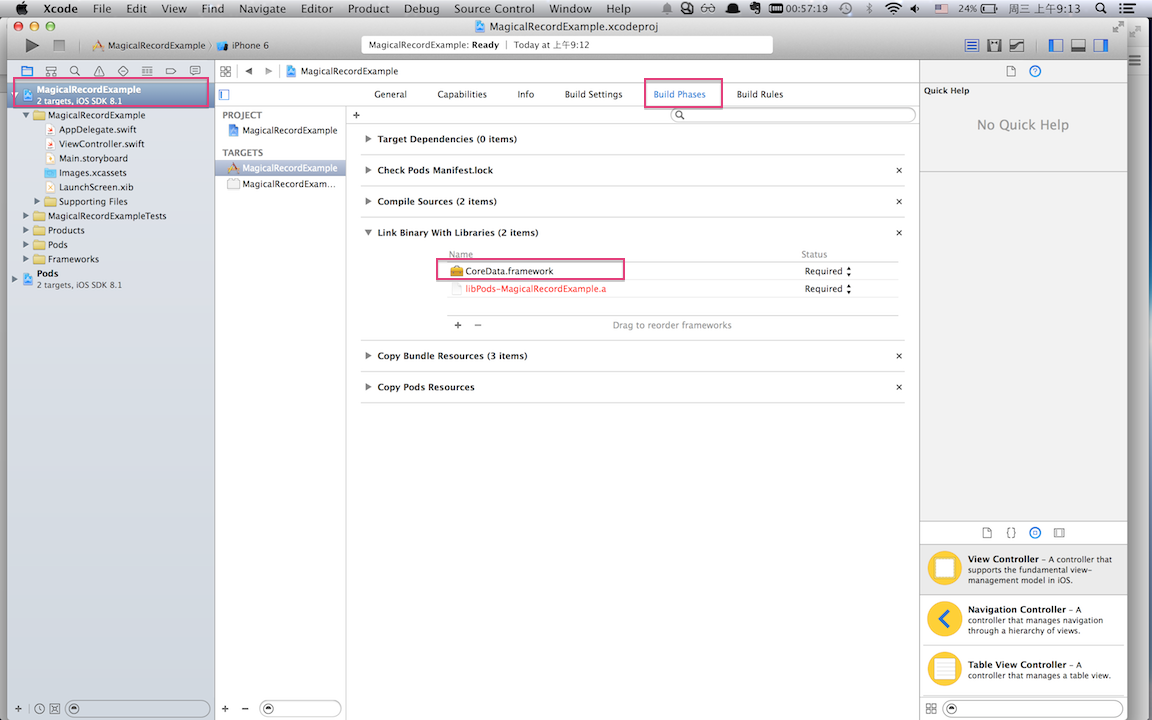
在MagicalRecordExample项目的Build Phases中的Link Binary With Librarys中添加CoreData.framework
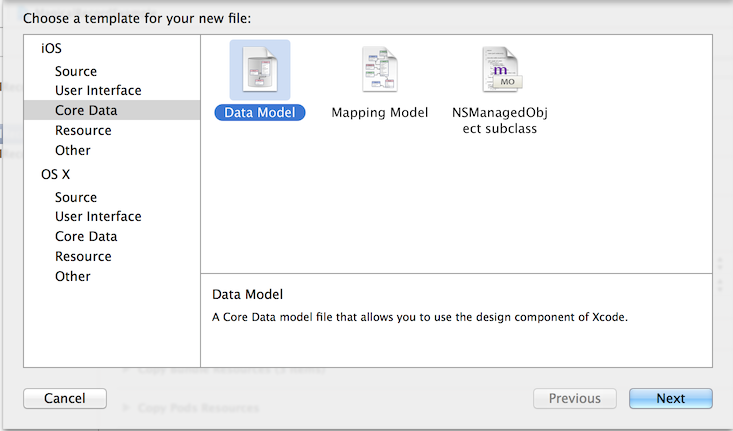
新建Model文件
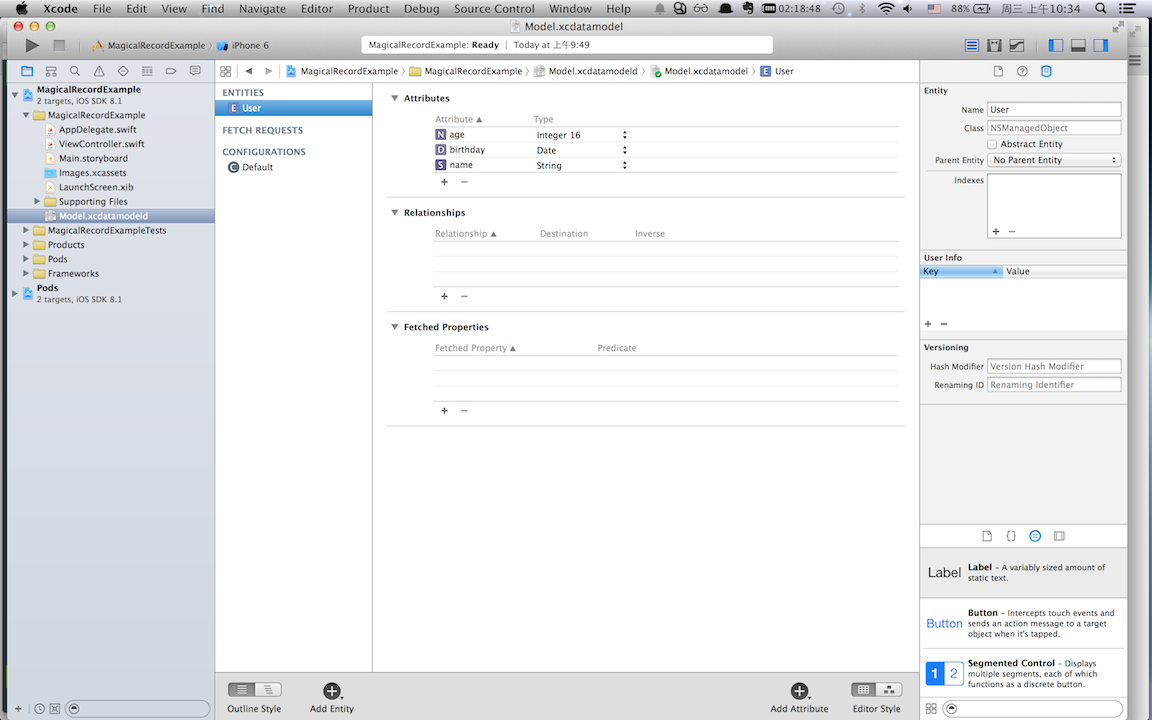
添加Entity
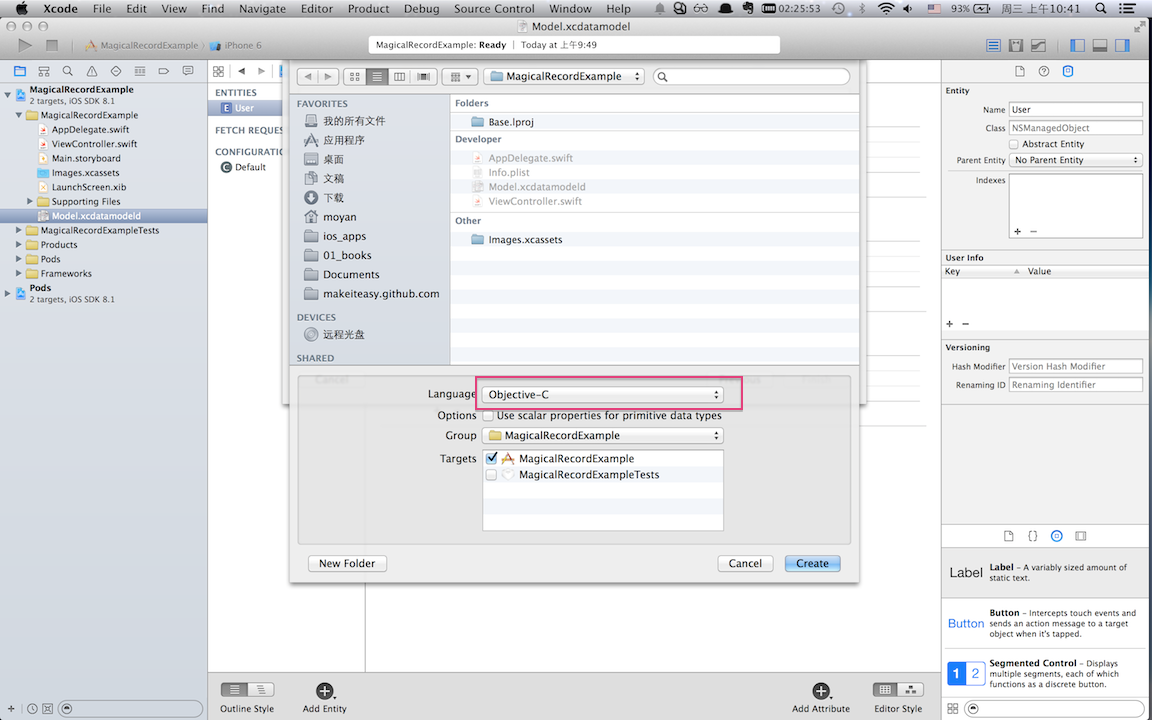
生成NSManagedObject Subclass
- 方法1: 选中User Entity,然后点击菜单[Editor]->[Create NSManagedObject Subclass…]
- 方法2: 选择菜单栏 File->New->File…(或者command+N),然后选择Core Data中的NSManagedObject subclass
如下图,注意在选择Language的时候,使用Objective-C,不要使用Swift,原因参照以下链接(该Bug截止2015/02/04还没有解决):
‘unknown database’ when namespacing models in Swift
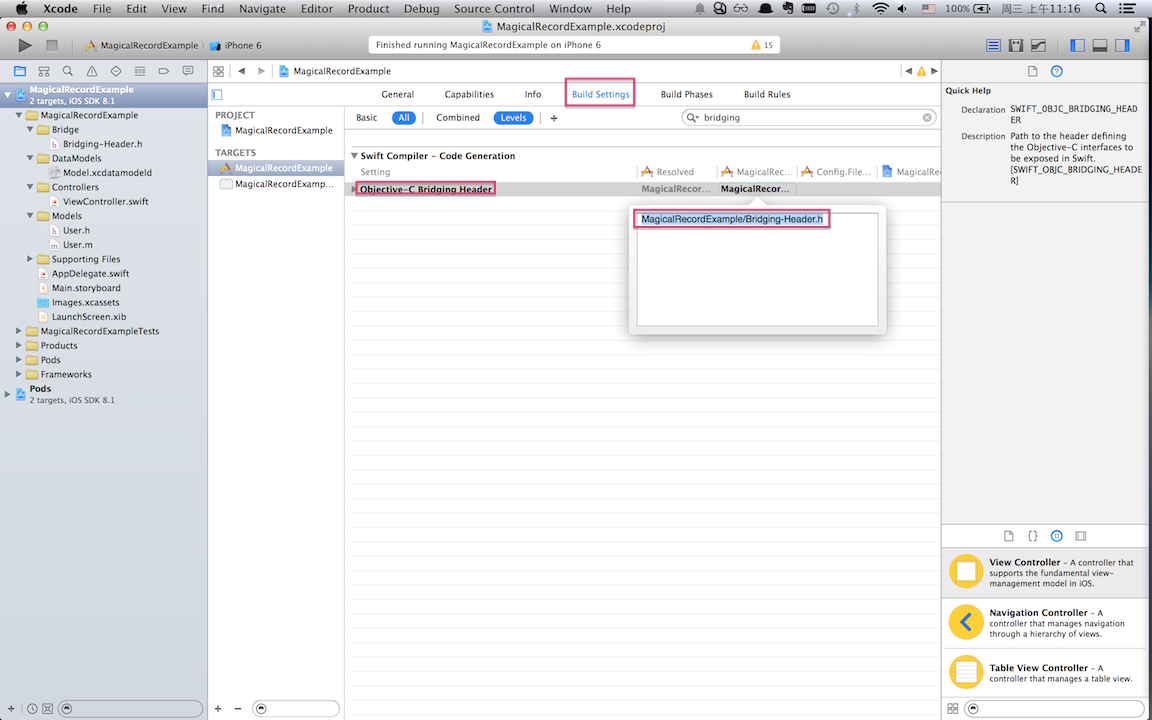
新建Bridge文件
新建一个[Bridging-Header.h]文件,然后在其中加入以下内容:
#import "CoreData+MagicalRecord.h"
#import "User.h"
在工程的Build Settings中配置Objective-C Bridging Header,如下图:
使用MagicalRecord进行CRUD
这里只是列出了关键代码,具体的工程可以参考以下链接:
MagicalRecordExample项目Github地址
在AppDelegate中配置CoreDataStack
这里的参数是数据库的名字,可以任意。
func application(application: UIApplication, didFinishLaunchingWithOptions launchOptions: [NSObject: AnyObject]?) -> Bool {
    MagicalRecord.setupCoreDataStackWithAutoMigratingSqliteStoreNamed("MagicalRecordExample.sqlite")
    return true
}
添加User
- 方法1:
// 如果使用这里的代码,那么马上就会提交到数据库,而且block应该是异步执行的
MagicalRecord.saveWithBlock({(context: NSManagedObjectContext!) in
    let user : User = User.MR_createInContext(context) as User
    user.name = self.txtUsername.text
    user.age = self.txtAge.text.toInt()
    user.birthday = self.dpBirth.date
})
- 方法2:
// 使用下面这种方式,只是把数据保存在了Context中,并没有立即反应到数据库中。
// 只有自己调用了 NSManagedObjectContext.MR_defaultContext().MR_saveToPersistentStoreAndWait()
// 才会保存数据到数据库
let newUser = User.MR_createEntity() as User
newUser.name = self.txtUsername.text
newUser.age = self.txtAge.text.toInt()
newUser.birthday = self.dpBirth.date
更新
// 得到一个Entity的引用后直接更新属性即可
user.name = "name updated"
删除
// Remove all records
User.MR_truncateAll

//Delete single record, after retrieving it
user.MR_deleteEntity
保存
NSManagedObjectContext.MR_defaultContext().MR_saveToPersistentStoreAndWait()
总结
- 即使有多个Data Model文件,iOS也会在运行的时候把多个Model文件进行Merge(这个可以通过在两个model文件中添加同名的Entity来验证,系统启动的时候会报错,无法Merge)
- 调用MR_saveToPersistentStoreAndWait用于保存到数据库中.
